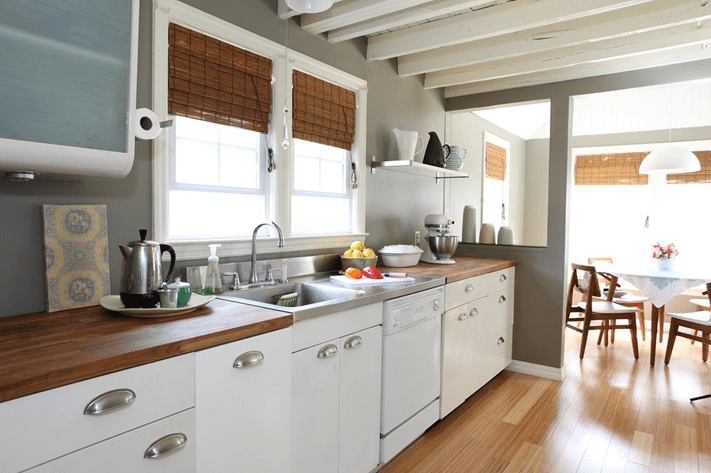
Inside many homes, the kitchen is a hub of activity and a reflection of personal style. Cabinets play a pivotal role in both functionality & aesthetics. However, over time, they can show signs of wear and tear. That leaves homeowners with a dilemma: replace or refinish. The Fire Restoration Team has prepared a guide that explores the transformative power of DIY cabinet refinishing. That should give homeowners a cost-effective and creative means to rejuvenate their kitchen spaces. From the benefits of refinishing versus replacement to the steps needed to complete this project, this seven-step article will allow you to complete your kitchen renewal, one cabinet at a time.
Pros or Benefits of Cabinet Refinishing
Cabinet refinishing offers numerous advantages. It is a compelling choice for homeowners looking to revamp their kitchen economically while minimizing environmental impact by reducing waste. Customizing the cabinet’s appearance is another benefit that manifests what the homeowner wants more accurately in their desired kitchen aesthetics than an outsourced service.
Tools and Materials Needed
Gathering the right tools is essential for a successful cabinet refinishing project. The vital tools include sandpaper for surface preparation, brushes, or sprayers for applying finishes, and screwdrivers for removing cabinet hardware. Proper safety gear is crucial to protect against contaminants. The choice of materials, such as paint or stain, will depend on the desired cabinet finish. With these things ready, you’ll be well-prepared to begin your cabinet refinishing journey.
Step 1: Preparing for the Project
Before diving into cabinet refinishing, thorough preparation is paramount. This phase involves carefully removing cabinet doors. Crucially, adequate ventilation measures for the surrounding area reduce contamination. Proper preparation sets the stage for a smooth cabinet refinishing project, guaranteeing that you can work to achieve the desired results in your kitchen’s transformation.
Step 2: Cleaning and Surface Preparation
Effective cabinet refinishing starts with meticulous surface preparation. Removing layers of grease, grime, and dirt is a must for achieving a durable finish. Cleaning facilitates how paint or stain adhere onto surfaces while sanding creates a receptive surface for the new finish. By paying attention to these critical steps, you’ll be well on your way to achieving professional-looking cabinet refinishing results that breathe new life into your kitchen.
Step 3: Choosing the Right Finish
Selecting the appropriate finish is a pivotal step in the cabinet refinishing process. Different finishes, such as paint or stain, offer protective qualities. By understanding the characteristics of each finish, you can confidently proceed with the refinishing project, knowing that your cabinets will look stunning and long-lasting.
Step 4: Painting or Staining
Both techniques can dramatically transform the appearance of your cabinets. Painting offers a broad spectrum of color choices while providing a clean, contemporary look. On the other hand, stability enhances the natural wood grain, offering warmth and character. You can execute your chosen finish with precision. Whether you opt for paint or stain, this vital step equips you with the knowledge to achieve a professional-grade cabinet transformation.
Step 5: Adding New Hardware

The impact of cabinet hardware on your kitchen’s aesthetics matters. Selecting the proper hardware and installing new cabinet handles, knobs, or pulls are some things to consider carefully. These small yet impactful details can accentuate your chosen cabinet finish. Additionally, they can tie together the overall kitchen design. By understanding the installation process, you can make informed choices that elevate your newly refinished cabinets’ visual appeal and functionality.
Cabinet hardware serves as the jewelry of your kitchen cabinets. It can entirely transform the look and functionality of your cabinets. When considering new hardware, start by assessing your kitchen’s overall style. Do you prefer a modern, sleek, classic, traditional look? Your hardware choice should align with this aesthetic.
Next, consider the practical aspects. Handles, knobs, and pulls come in various sizes. Think about how functional they will be for daily use. For instance, if you have small children, you might opt for handles that are easy to grip. Once you’ve made your hardware selections, installation is the next step. You can install them with essential tools such as a screwdriver.
Adding new hardware is like the finishing touch on a masterpiece. It harmonizes with the cabinet finish, which creates a cohesive and polished look. Whether you choose sleek stainless-steel handles, vintage brass knobs, or something unique, these details complete your cabinet refinishing project, which leaves your kitchen looking refreshed and stylish.
Step 6: Reassembling and Organization
After completing step 5 installation, reassembling your cabinet components would be next. This crucial step involves aligning doors, ensuring proper spacing, & securely attaching hardware. Precise reassembly is critical to the functionality of your cabinets.
Also, adding cabinet liners or organizers to enhance the organization of your cabinets can bring out the design. After ensuring that everything is in place, it’s time to clean up the workspace.
Step 7: Maintenance and Care
Maintaining & caring for your newly refinished cabinets is necessary to ensure their pristine appearance. Regular cleaning with non-abrasive solutions is vital to preventing grime buildup. Avoid using abrasive scrubbers that could damage the finish. Check up on the cabinets every so often to ensure no disrepair. Examples include loose hardware or minor wear and tear to address them promptly. This step marks the final stretch of your refinishing journey, bringing your kitchen makeover to a satisfying conclusion.


