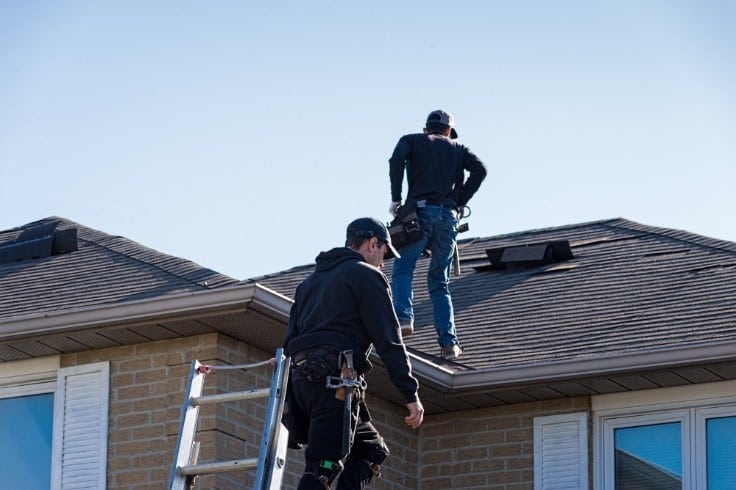
If you recently installed a new roof, you might feel relieved to have it behind you finally. However, one more critical step is to inspect your roof after installation! A quality inspection is the best way to catch minor issues before they become more significant problems and ensure everything is done correctly and to standard.
Whether your contractor recommends an inspection or not, taking matters into your own hands can prove invaluable in the long run. After all, no one else cares as much about protecting your home and investments as you! Today, we’ll explore what exactly needs to be inspected right after a roof installation so that you know what areas need special attention. Let us walk through the critical elements of inspecting a newly finished roof together.
Why Is It Important to Inspect the Roof?
Roof inspections are crucial for a few reasons. First and foremost, it ensures that the installation is completed correctly and to industry standards. This helps to avoid any potential issues down the line and gives you peace of mind knowing that your roof is secure.
Another important reason for inspecting your newly installed roof is to identify any possible problems or defects early on. Catching these issues early allows you to address them immediately and avoid any costly repairs or replacements in the future.
Moreover, regular inspections can help prolong the lifespan of your roof by identifying any potential weak spots or areas that require maintenance. You can save time, money, and stress by catching these early and keeping up with routine maintenance.
What to Look For During the Roof Inspection
The following section details the specific areas and components you should focus on during your post-installation roof inspection. Knowing where and what to look for can make the inspection process more efficient and effective.
From shingles to flashing, gutters, and more, we’ll guide you through each element that deserves scrutiny. Let’s dive deeper into the essential aspects of your new roof that require inspection.
Check the Shingles
One of the most critical components of any roof is the shingles. They are the first defense against harsh weather conditions and protect your home from water damage. During your inspection, ensure all shingles are aligned correctly and not missing or damaged.
Look out for any curling, cracking, or signs of wear and tear that could indicate an issue. Moreover, pay attention to the shingle’s color and texture, as discoloration or inconsistency could mean poor quality materials.
Inspect the Flashing
Flashing is another crucial element in your roof’s defense system, as it helps prevent water from seeping into vulnerable areas. Look closely at the flashing around chimneys, vents, and skylights to ensure they are correctly installed and sealed.
Any gaps or signs of damage should be addressed immediately to prevent leaks. Additionally, ensure the flashing is made of durable materials such as copper or aluminum, not plastic or tar paper, which can quickly deteriorate.
Look at the Gutters
While inspecting your roof, don’t forget about your gutters. They are crucial in directing water away from your home and preventing water damage. Make sure that they are securely attached and free of debris or blockages. Also, check for any signs of rust or wear that could impact their functionality.
Examine the Attic
Many homeowners must remember the importance of inspecting their roof from the inside, specifically in the attic. Look for any signs of light coming through or water stains that could indicate a leak. Also, check for any insulation that has become damp or displaced. These issues can lead to mold growth and compromise your roof’s integrity if left unchecked.
Check for Rot in Roof Decking
Remember to inspect the roof decking for any signs of rot or damage. This is the layer that supports your roof’s structure, so it’s crucial to ensure its integrity. Signs of rot can include sagging or soft spots in the decking and should be addressed immediately to prevent further damage. Sometimes, rot can also indicate improper installation or ventilation issues.
Make Sure the Ridge Vent is Properly Installed
The ridge vent is essential to your roof’s ventilation system and helps regulate temperature and moisture levels. During inspection, ensure it is properly installed and clear of any obstructions. Ensure the vent is adequately sealed to prevent water from entering your home.
FAQ
How can I ensure that the roof is installed correctly?
The key to a properly installed roof is hiring a reputable and experienced contractor. Make sure to do your research, read reviews, and ask for references before making a decision. If you’d like to schedule a free consultation with a roofing expert, visit this website for a free quote today.
How often should I inspect my roof?
Having your roof inspected at least once a year is recommended, preferably in the fall or spring. Additionally, it’s essential to have an inspection after any severe weather events such as storms or high winds.
What should I do if I find issues during the inspection?
If you discover any problems during your roof inspection, it’s essential to address them immediately. Contact a professional roofing contractor to come and assess the situation and provide a solution. Delaying repairs or maintenance can lead to more extensive damage and costly repairs in the future.
Final Thoughts
Inspecting your roof after installation is crucial for ensuring its longevity, identifying potential issues early on, and giving you peace of mind. By paying close attention to specific components such as shingles, flashing, gutters, and attic, you can catch any problems before they escalate. Remember to hire a reputable contractor for installation and regular maintenance to keep your roof in shape.


